Cameron Acreage Chicken Coop
Apr 2022 – Oct 2022
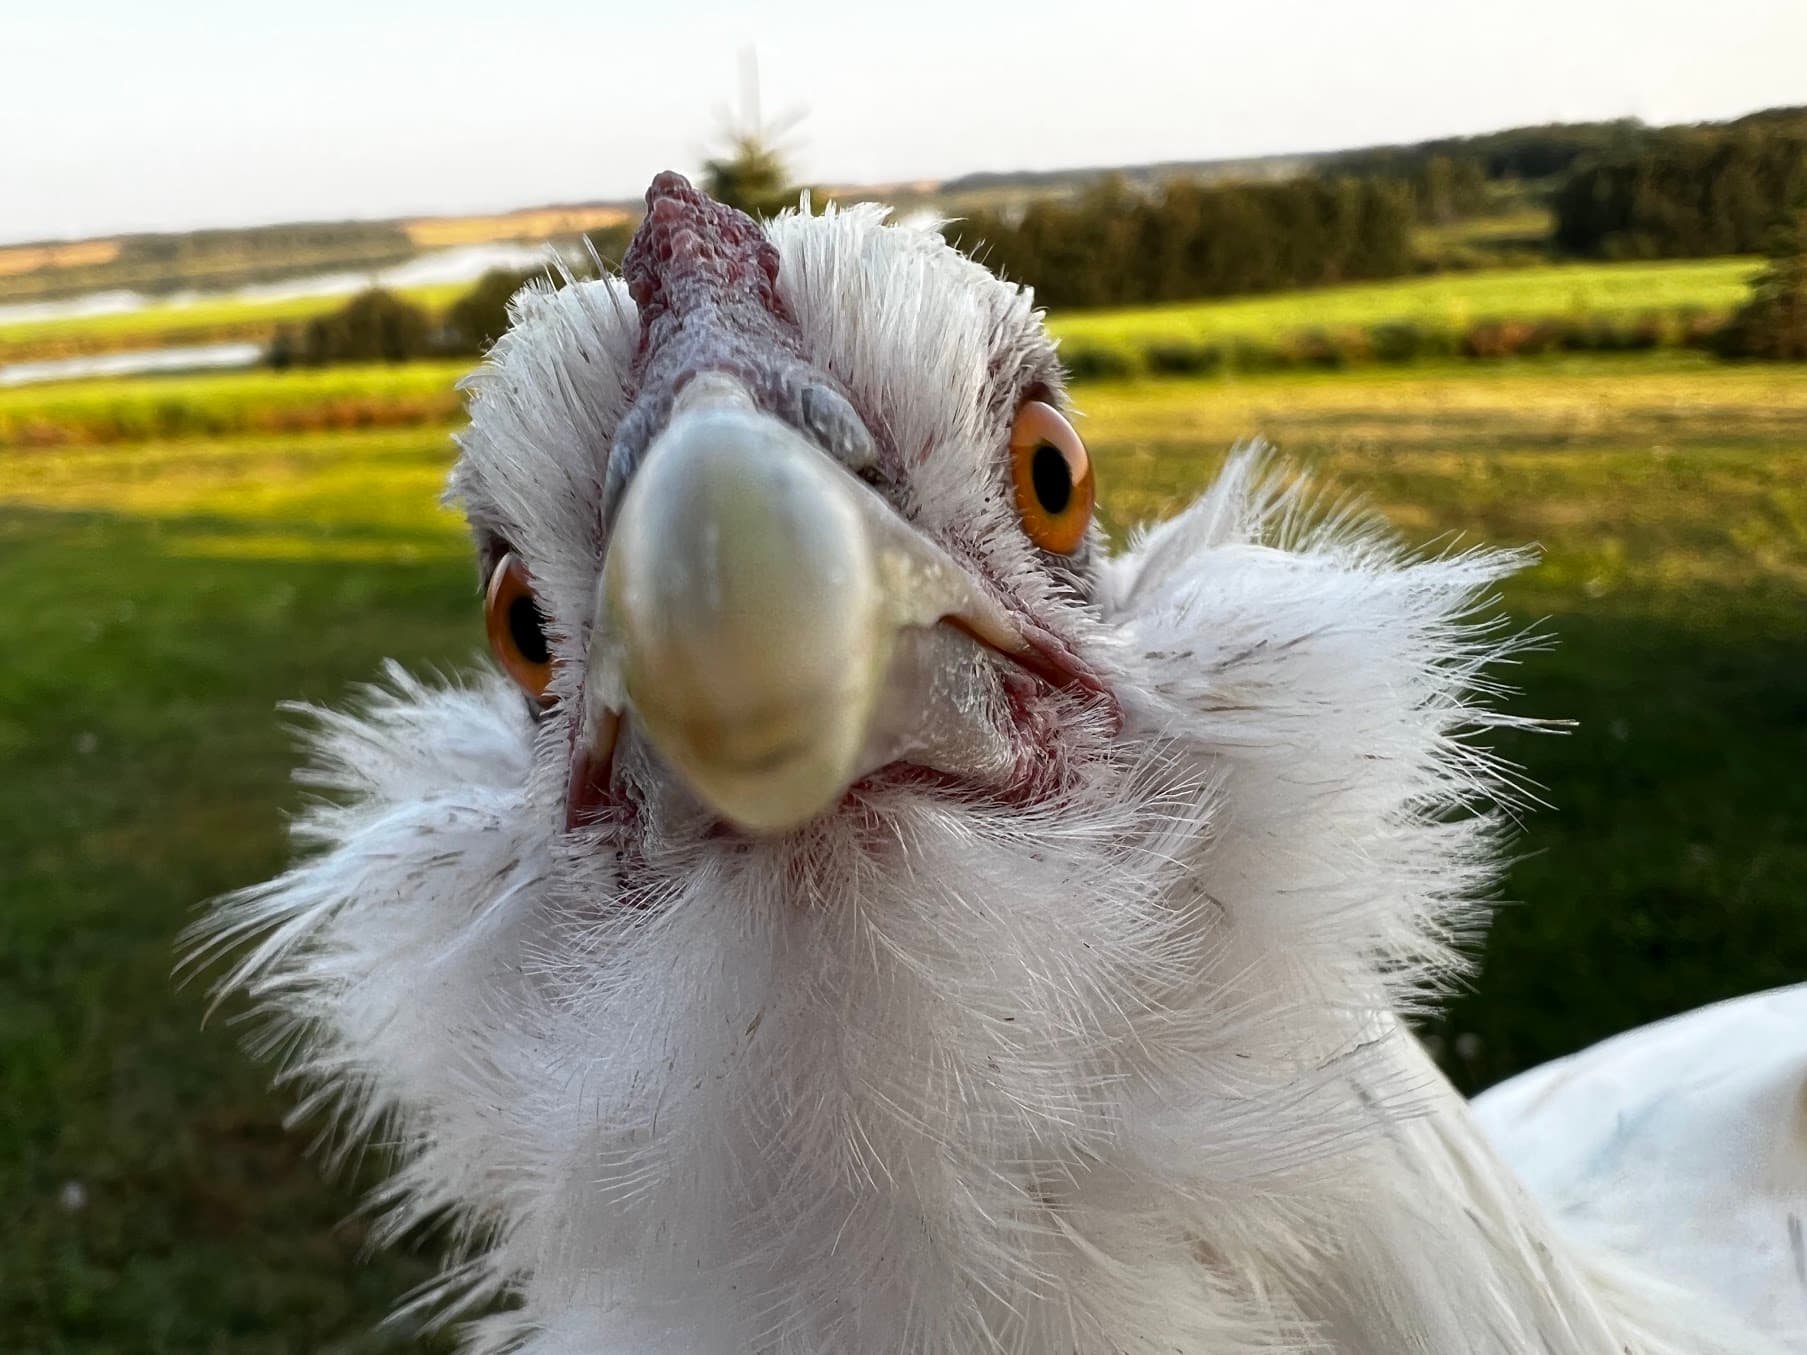
Our hen, Little Dove. Sweetest chicken ever.
In April 2022, my wife and I moved out to a rural acreage in Saskatchewan. Our reasons for moving were many, but one of the things we were most looking forward to was trying to live a more self-sufficient lifestyle. This included, of course, getting a bunch of chickens for eggs.
We got the chickens fairly early and raised them from chicks. We dove right in and got 3 chicks, and figured we would follow-up with the coop later. It wasn’t necessary for a while, because chicks can live in a plastic tote for quite some time.
To start, we picked up a rather cheap ~$500 coop from Peavey Mart, and this served as a pretty good coop for young and growing chickens. However, it was quite small. It also wouldn’t do in the winter because the materials were thin and uninsulated. It can get fairly cold in Saskatchewan, at times dipping below -30C.
So, then we had to design and plan a new coop. I figured that it would be best to use SketchUp for the initial plans. My wife had been watching hours and hours of YouTube videos, so she was the primary planner and requirements designator.
She wanted the main coop 9’×5’ with a 9’×12’ run. SketchUp was certainly an ordeal for both of us initially, but I learned some tips on using it. Once you start to make components and learn how to extrude/indent surfaces, it’s not bad at all.
SketchUp was extremely valuable. We were able to mockup the layout and get a feel for how things would work. Having never built any kind of structure before, it was very helpful for me to get a sense for how we’d lay out the studs. When it comes to cutting, you can easily measure against the diagram. We’d build a bit, then adjust our model as we built.
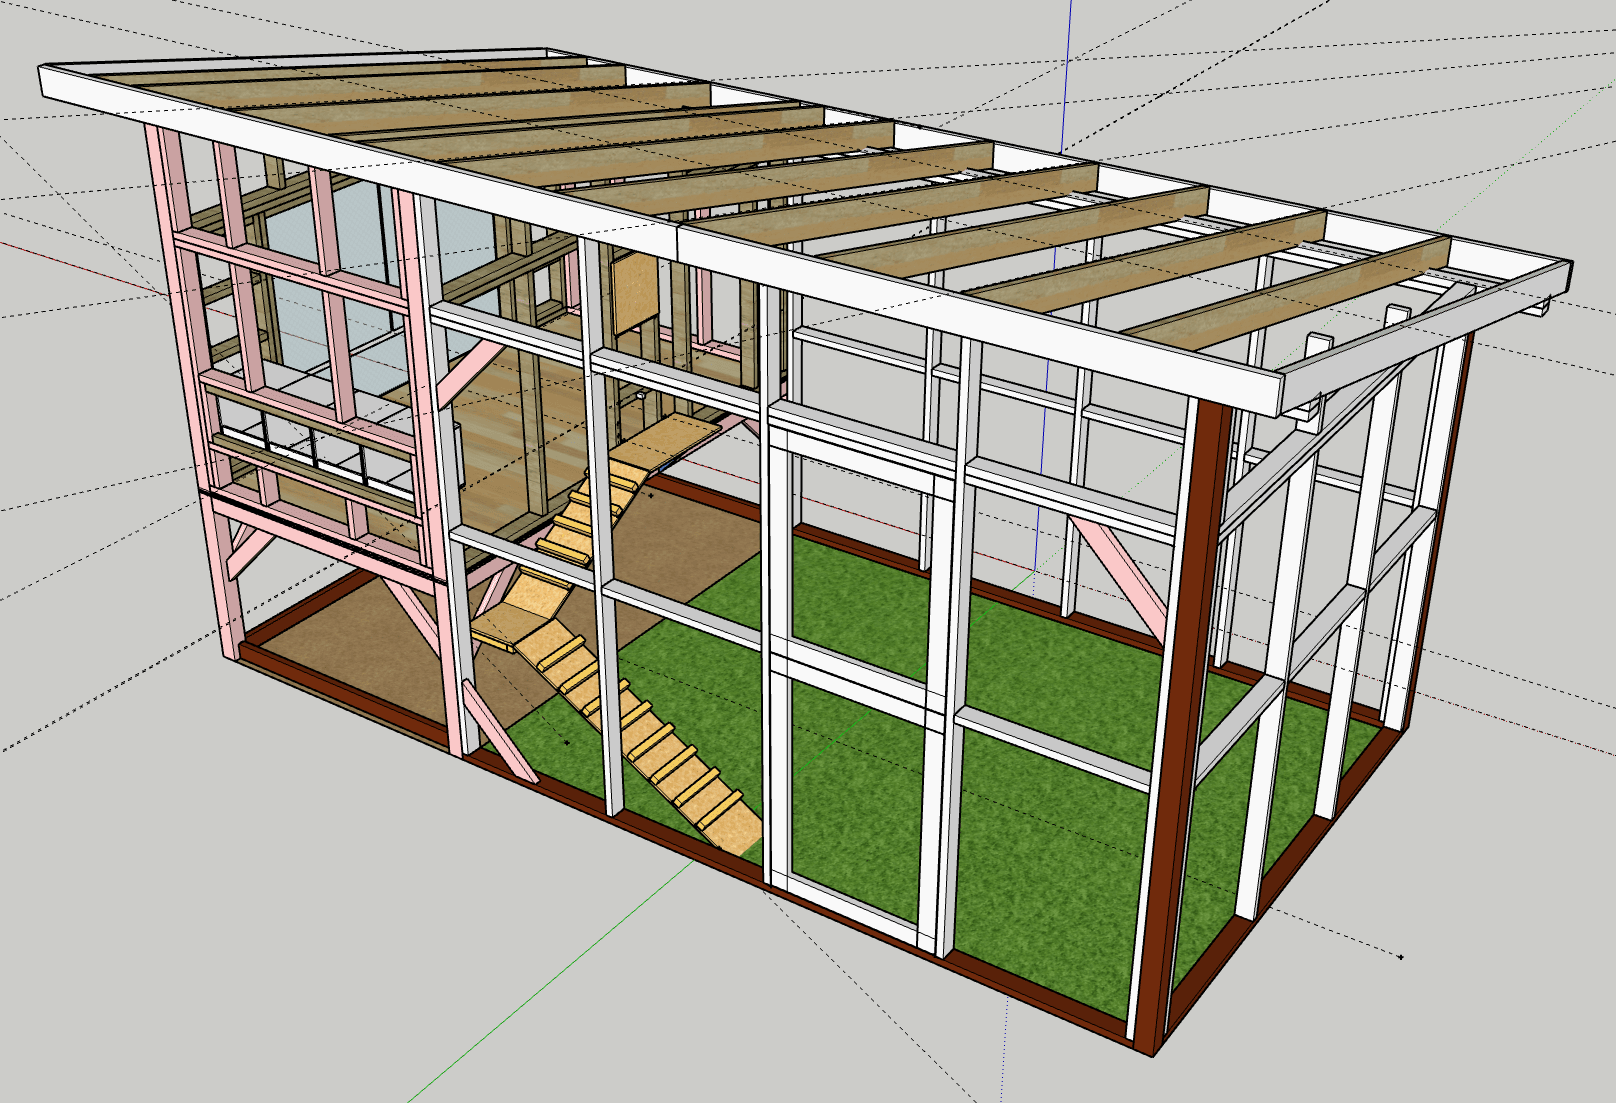
The latest SketchUp model. We started using various colors to denote different things, like pieces that were already cut.
Building the coop was a good exercise in communication for us. It was interesting to reflect on how often we miscommunicated and the source of the communication failure.
The build was not without its mistakes and perils. At least once we placed studs in the wrong position, which really messed up plans for insulation and interior/exterior siding. Our plan for the roof was not optimal, and if we had to do it again, I’d do the supporting beams for the leftmost and rightmost overhang differently. The quality of wood was really poor, most boards requiring extensive clamping during the framing process to get any kind of satisfactory result. We both suffered minor injuries throughout the process, but nothing too serious.
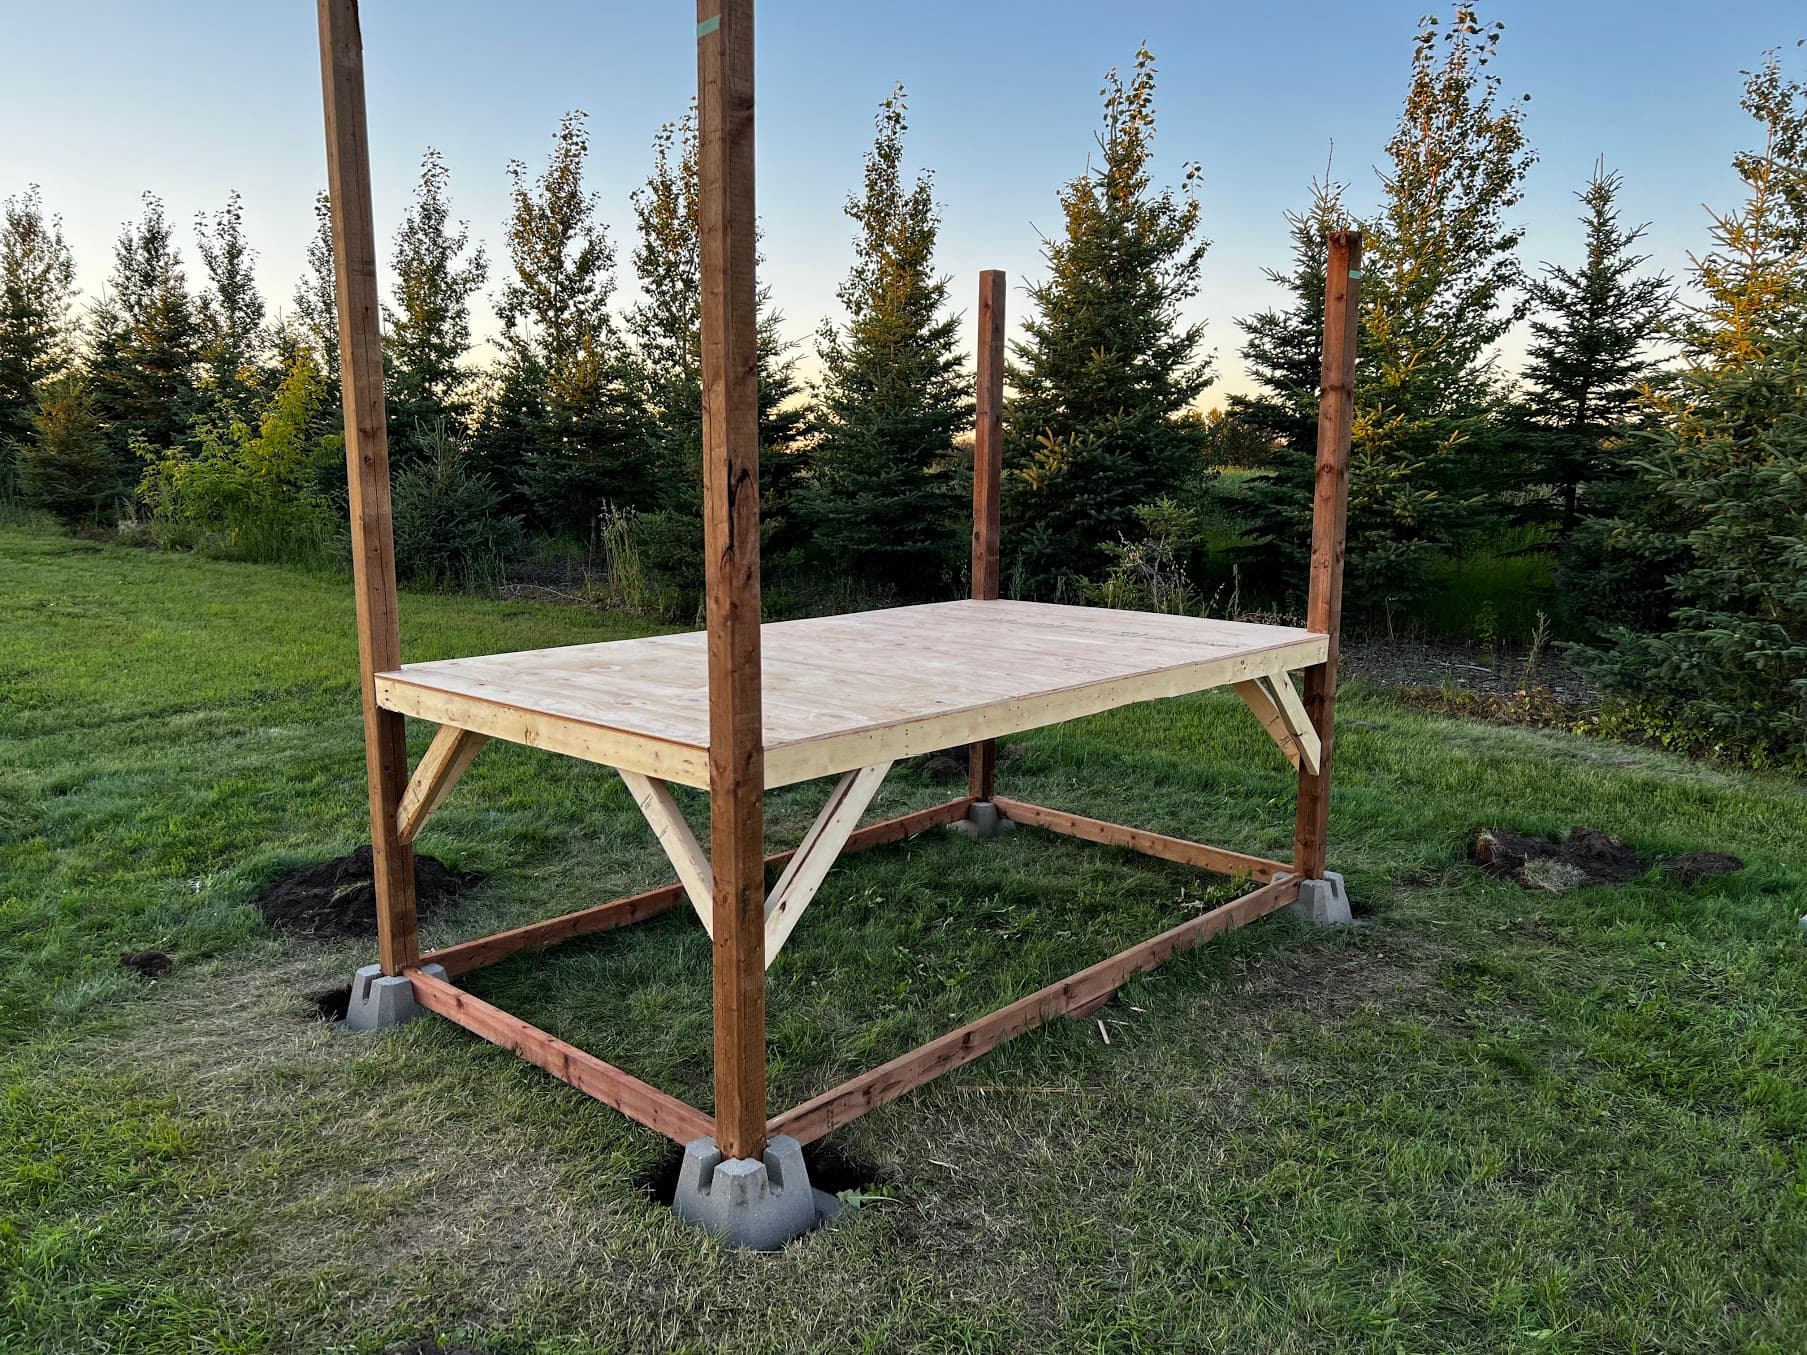
The initial structure of the coop, using 4×4s for the corner posts. In retrospect, I think we should’ve stopped the posts below the floor and framed regularly.
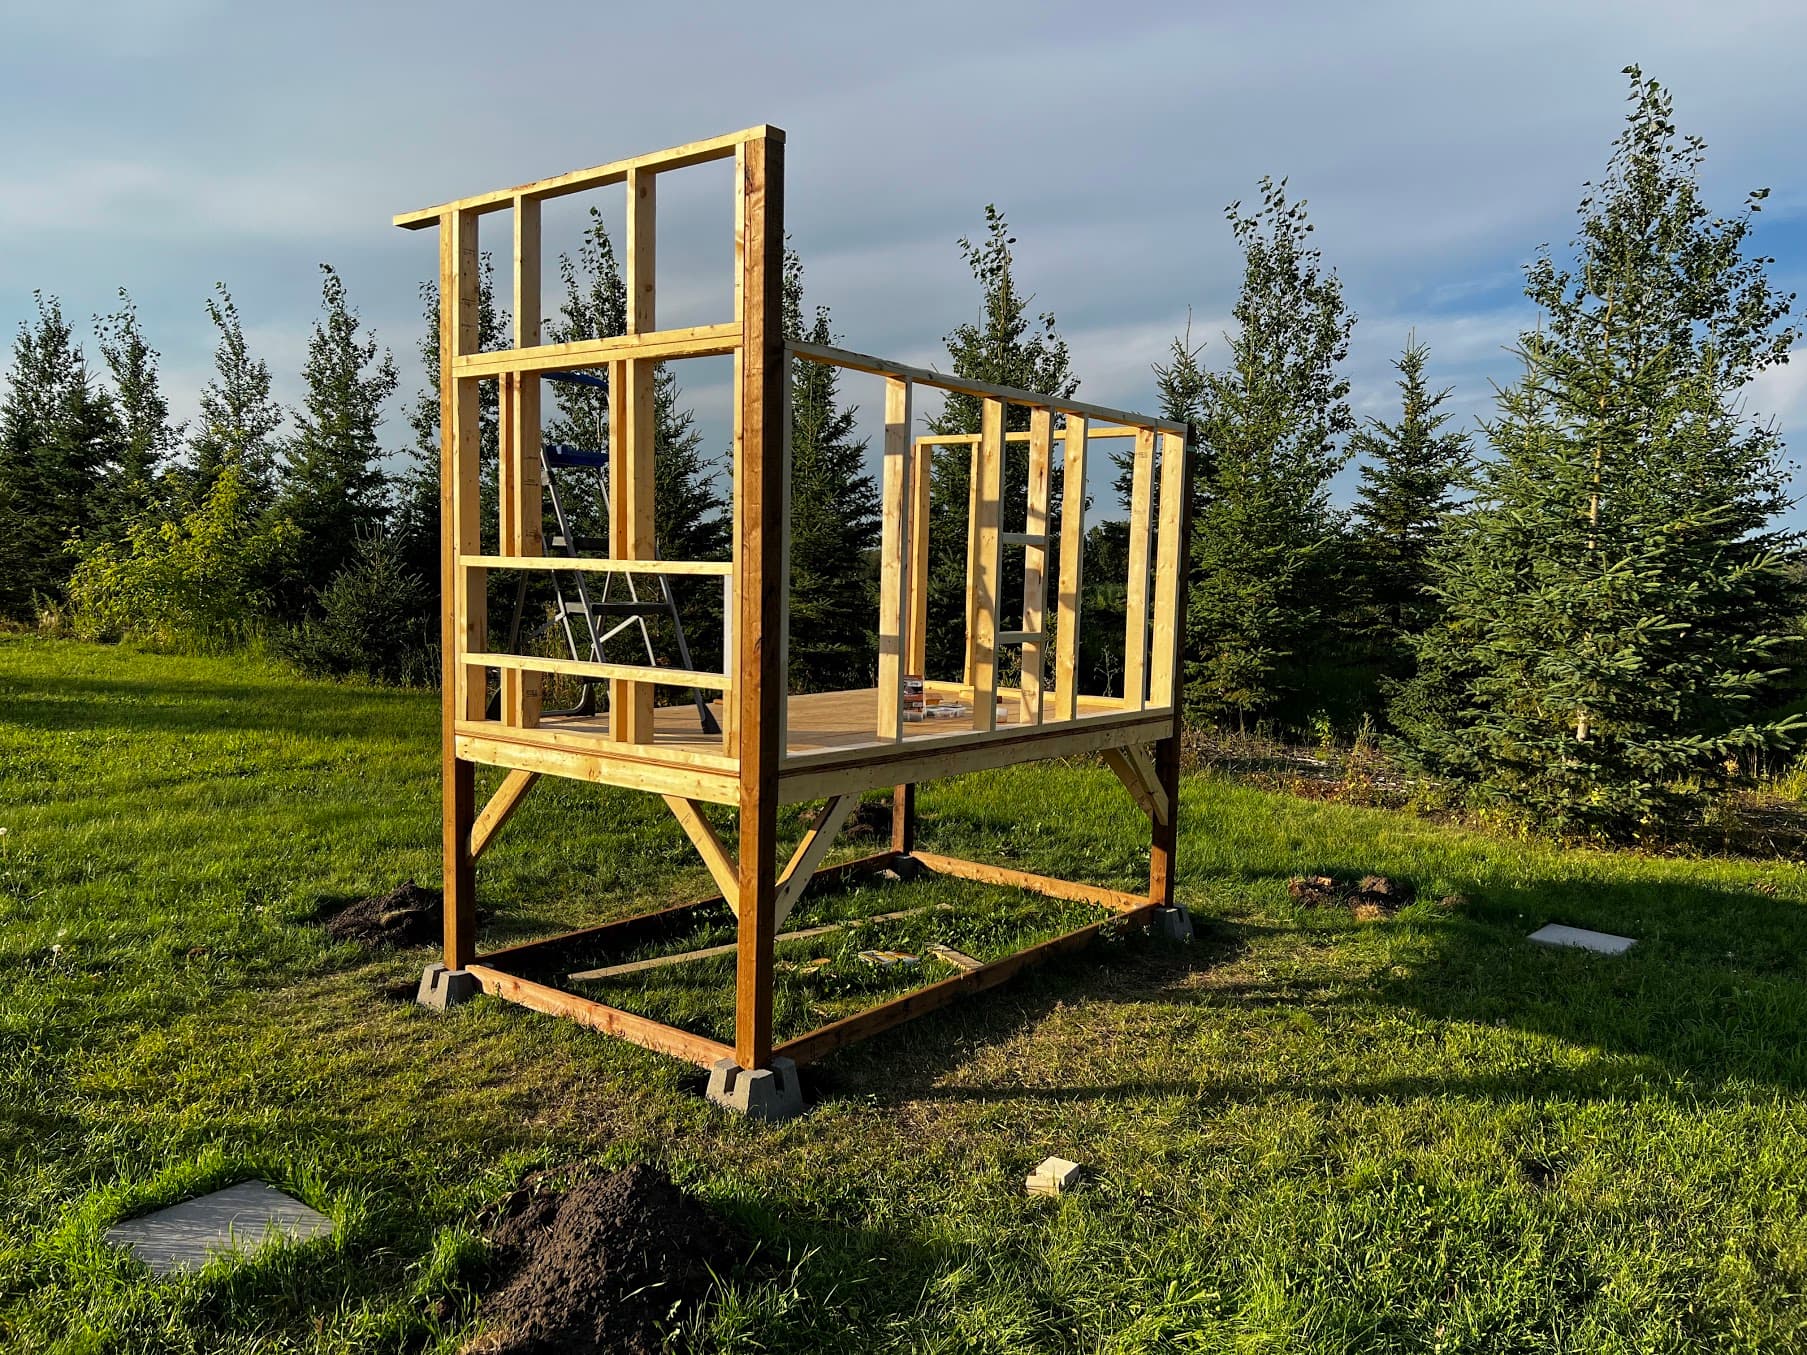
3 of the main walls framed. You can see the mistakenly placed studs on the left face. Luckily you can just add more. 😅
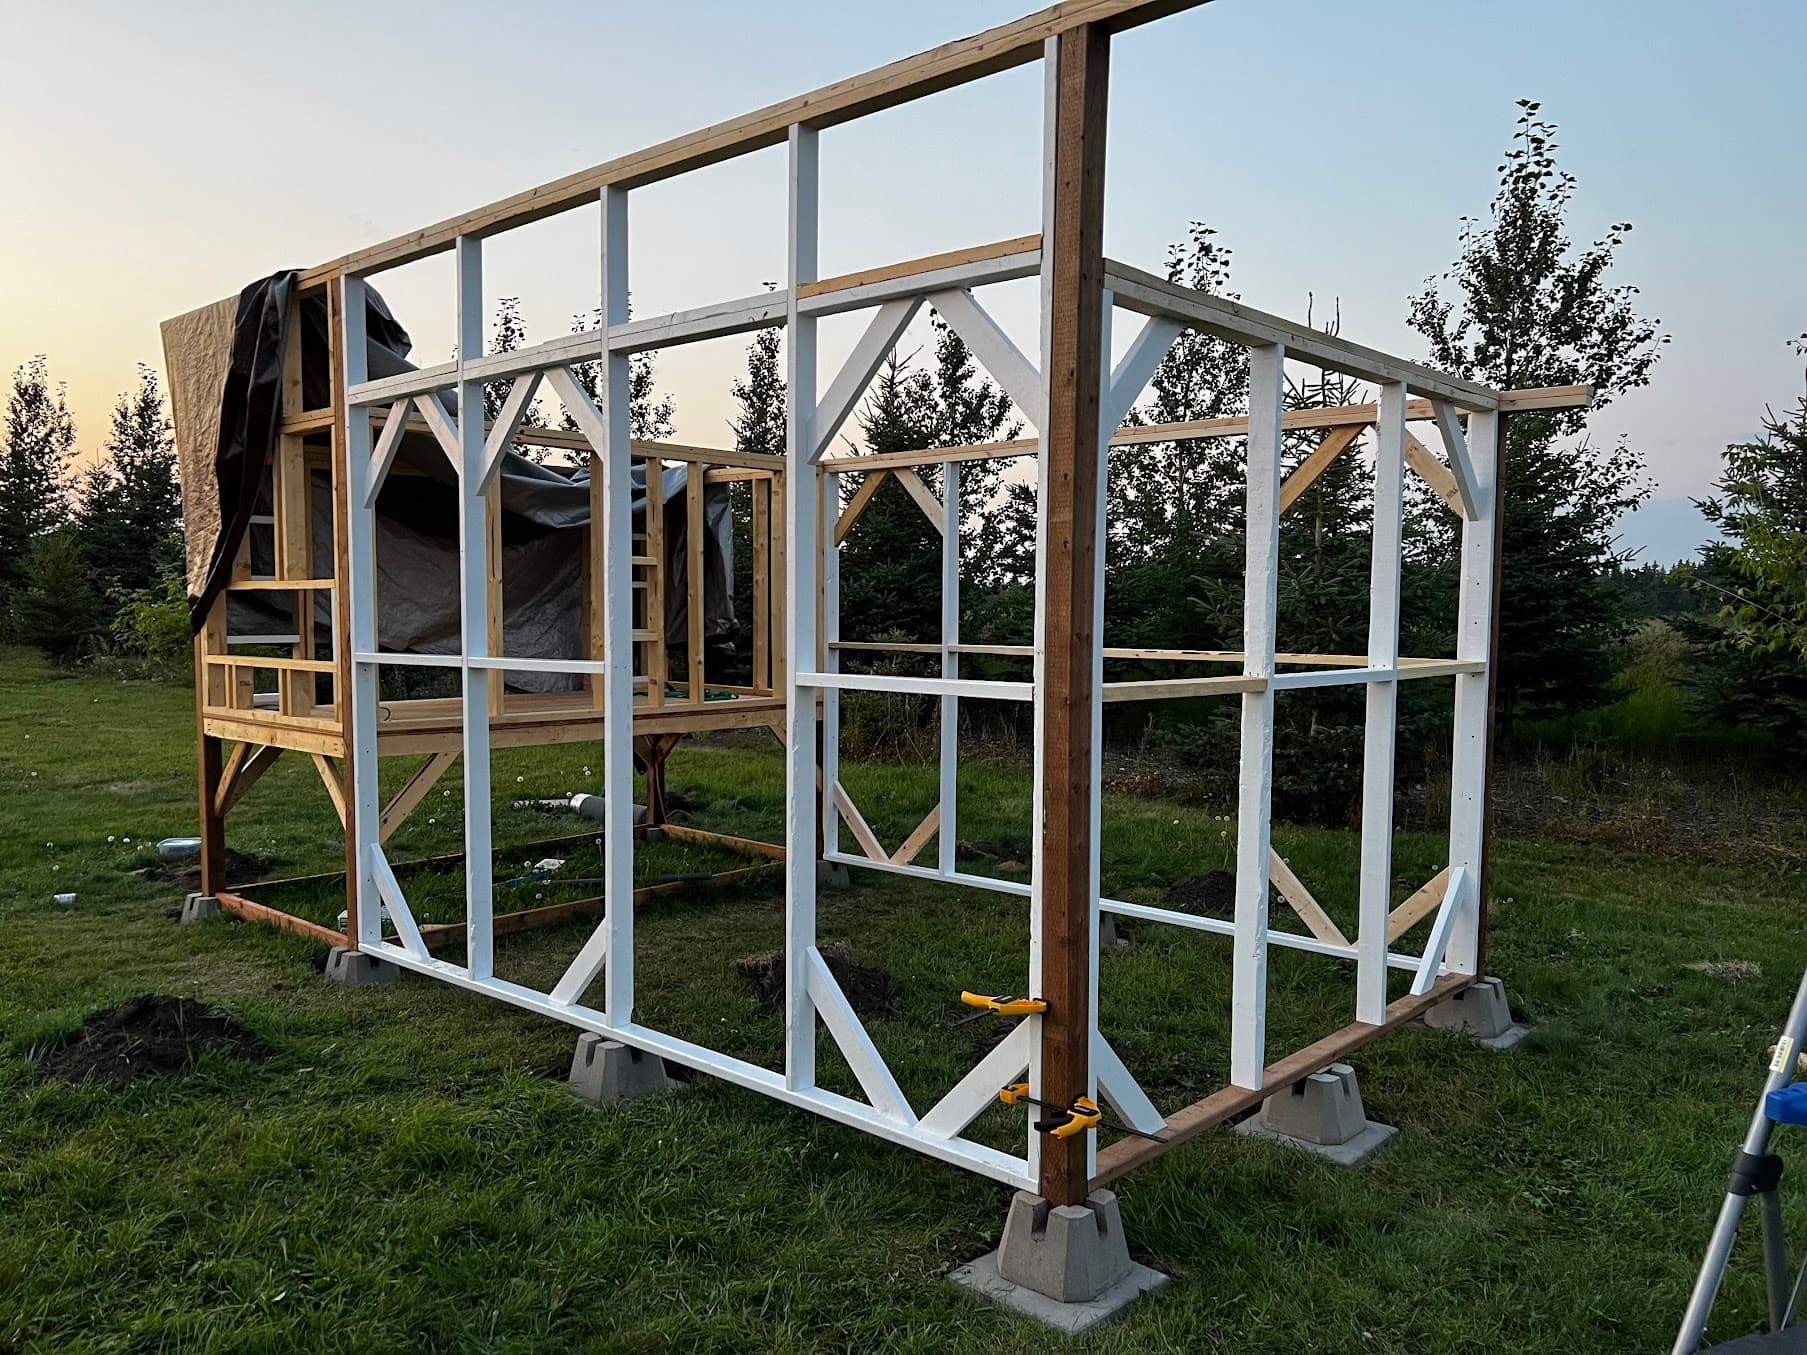
Next, we got the main run walls in place. The land slopes, so those piers weren’t as deep as I would’ve liked. We’ll have to backfill more dirt in the future to make a dirt platform of sorts.

We got some outside panels on, and I used a portable router with a panel pilot bit to make a nice hole for the egg door.
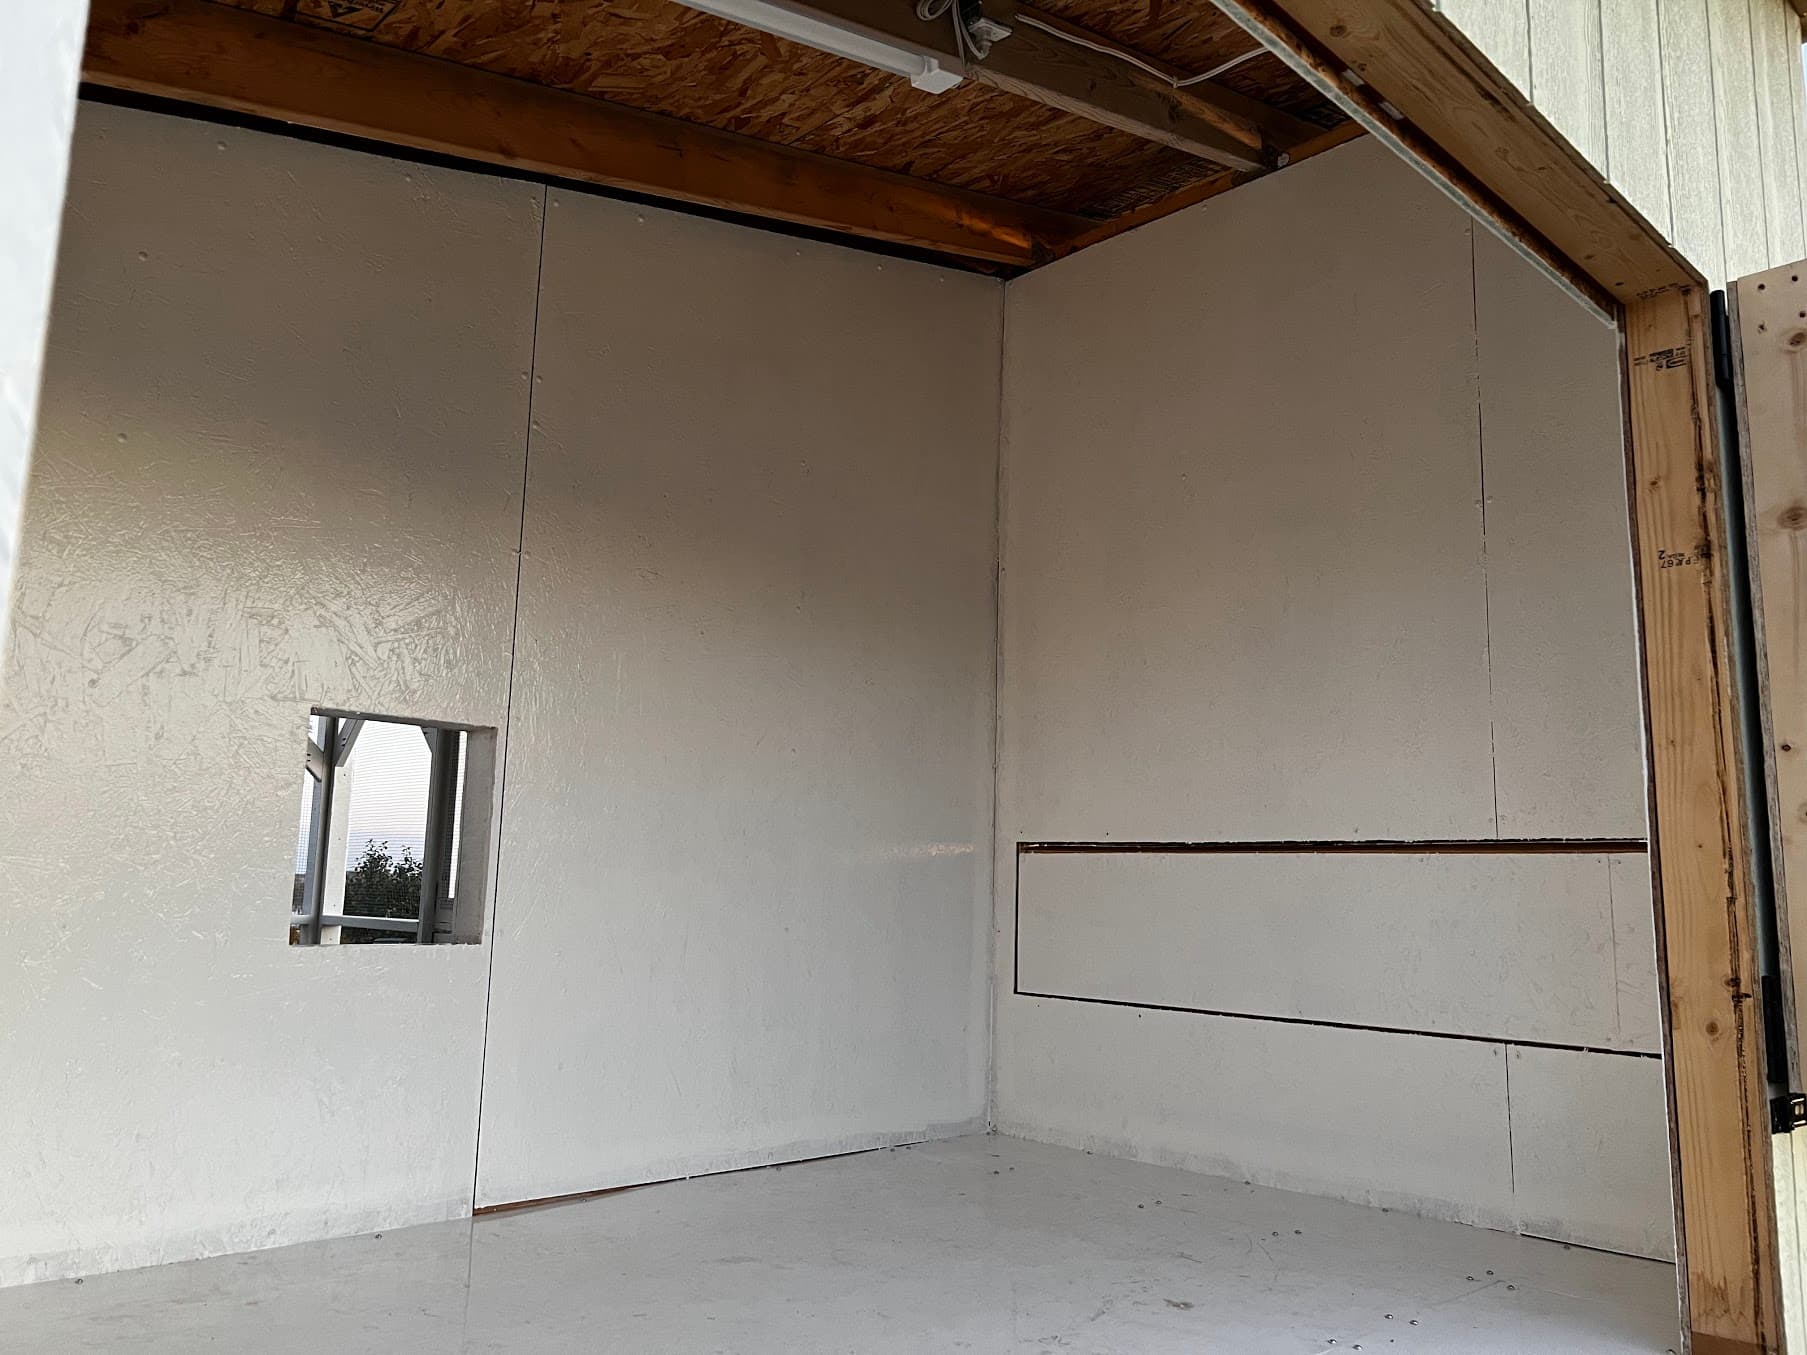
My wife painted the interior, and we used puck board for the floor. This makes the floor really easy to clean out. I put the electrical in, with a switched light on the roof and another electrical outlet in the top-left (out of frame).
The main coop doors are on. This was a tremendous pain. Hanging custom-made doors that are 3.5” thick (due to insulation) is tricky.
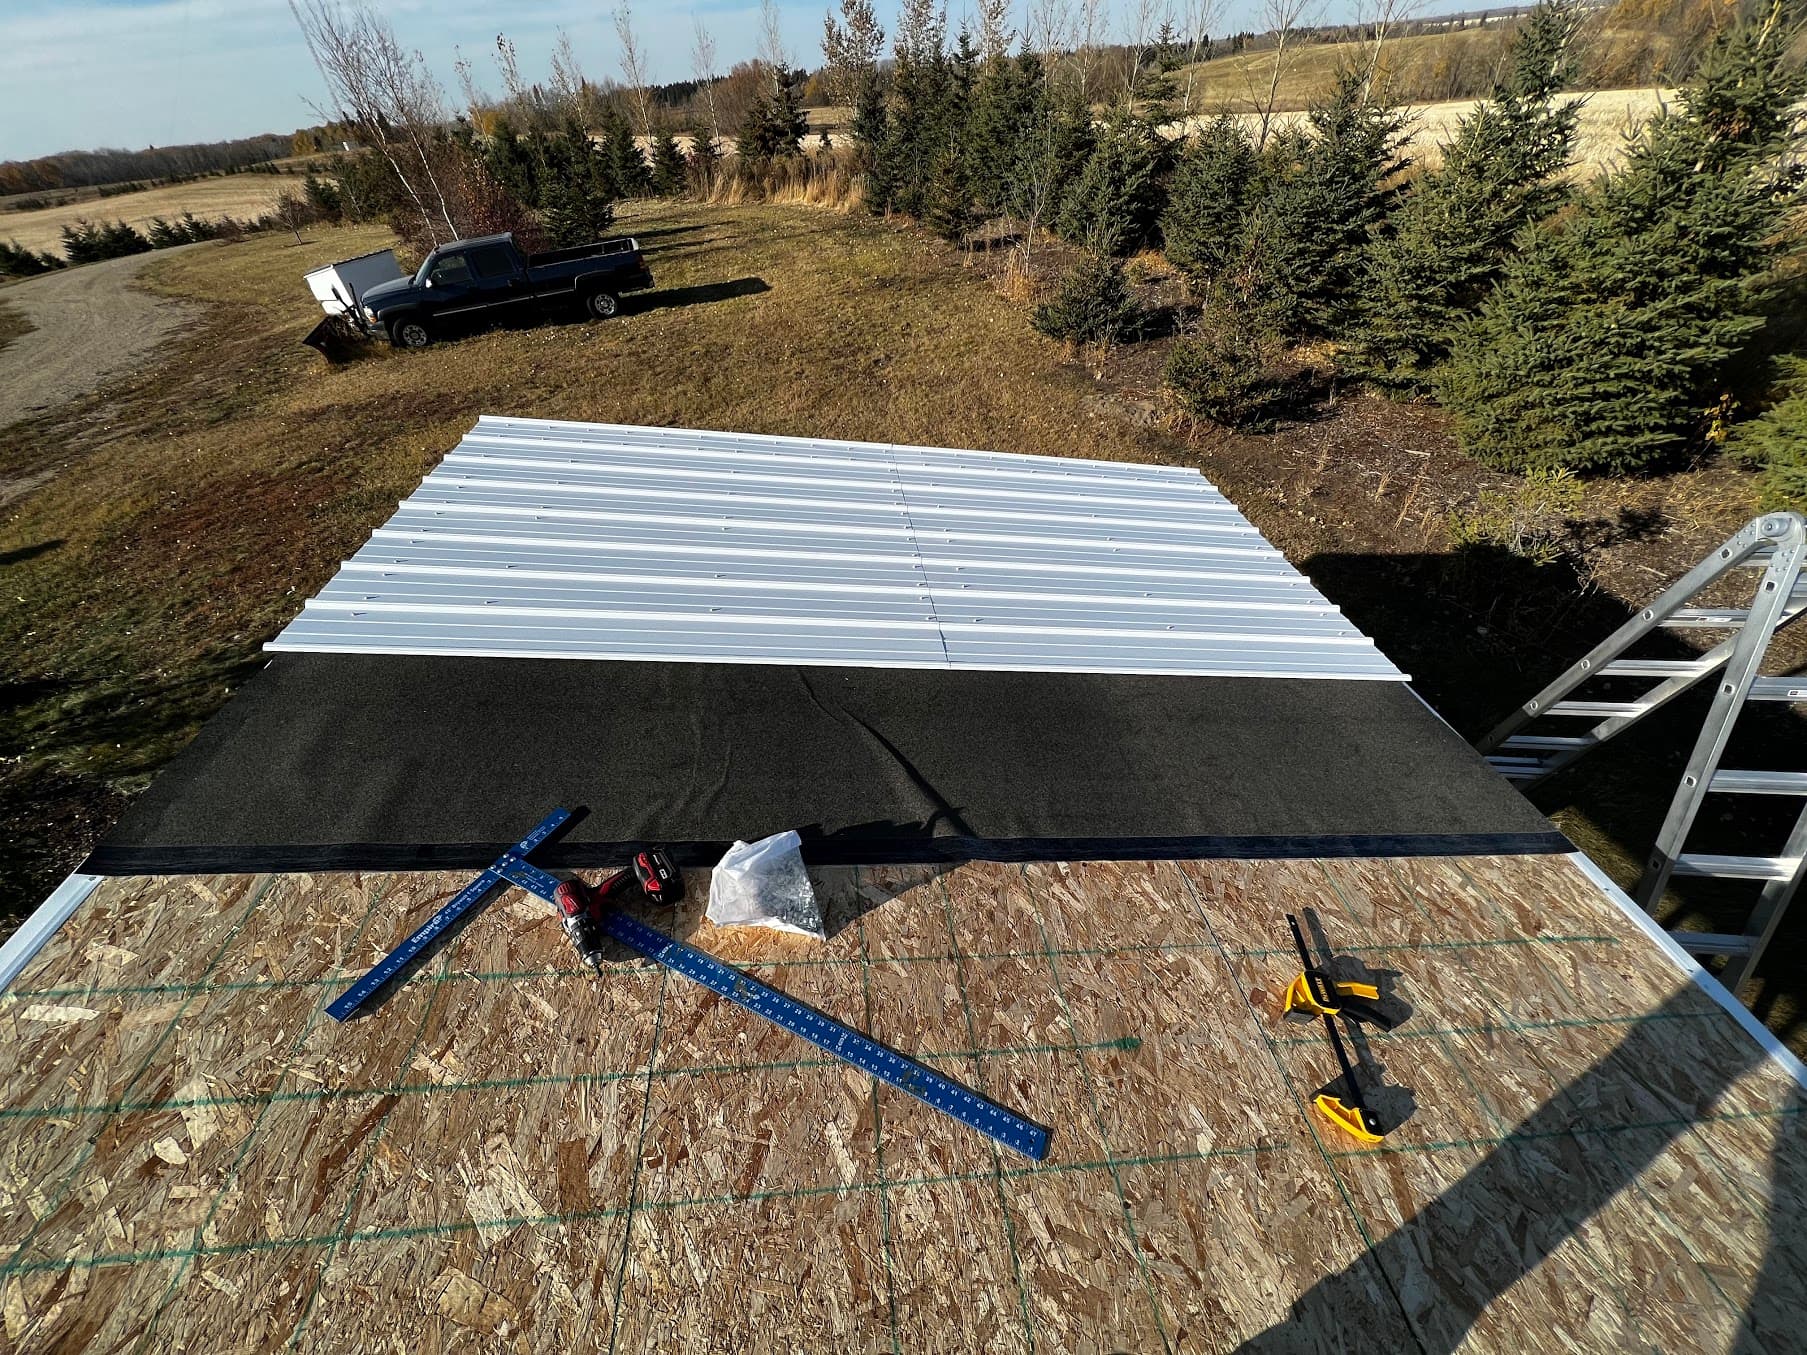
The roof was the part I was dreading the most, but it actually wasn’t too bad once I got started. It took about a day to get all the metal sheets on.
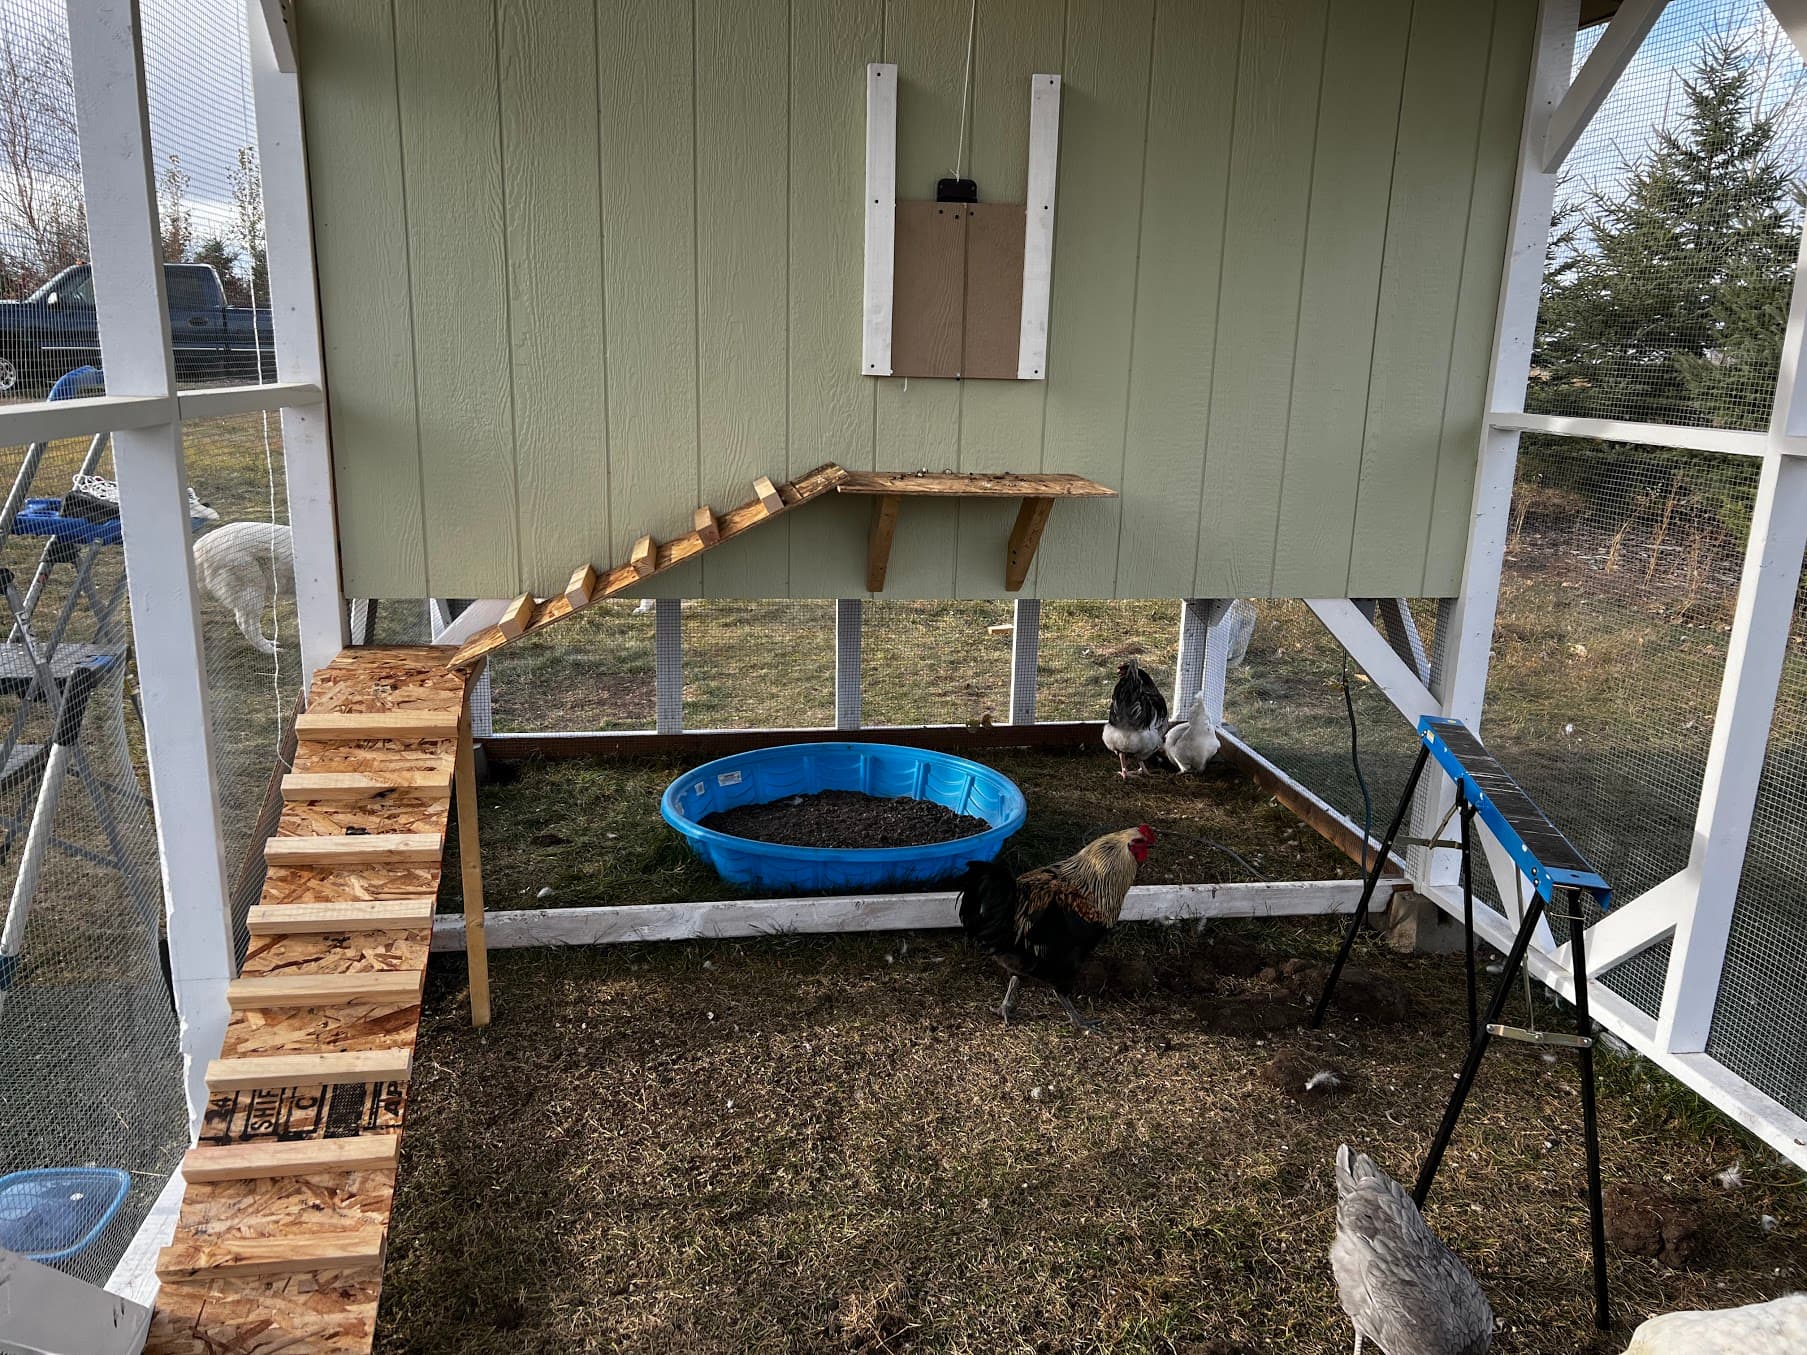
I made a ramp for the chickens to get up to the coop. I didn’t want to go straight out and down, because I figured that’d make it annoying for us to walk around in there, so I designed an L-shape that worked out pretty well!
The door is hooked up with 2 pulleys so that you can open it using a string from outside.
After fascia has been installed
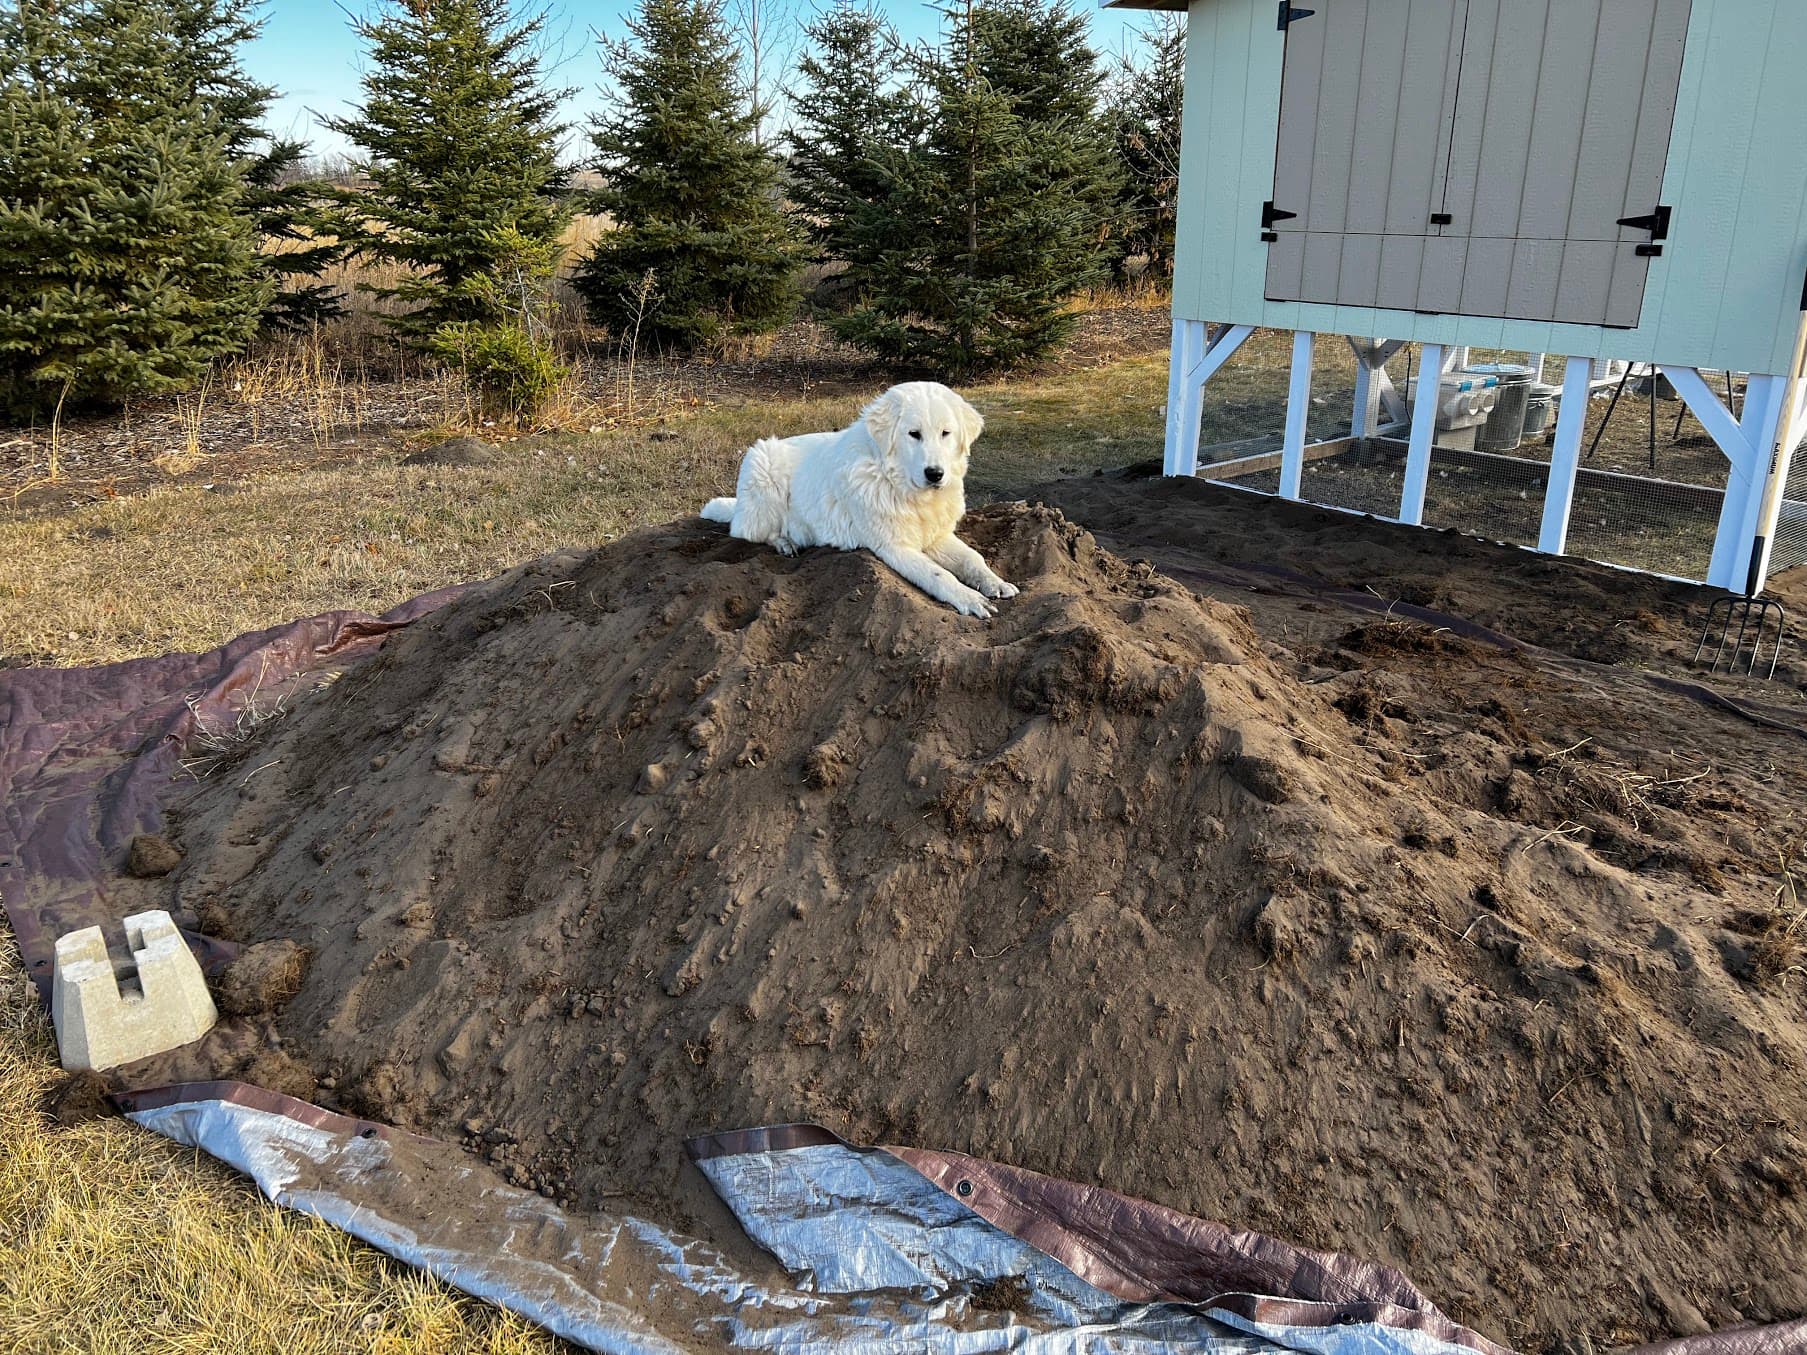
This is a pile of dirt that was used to backfill the near the base of the structure, to cover up the concrete piers and elevate the area. Our dog is loving it!

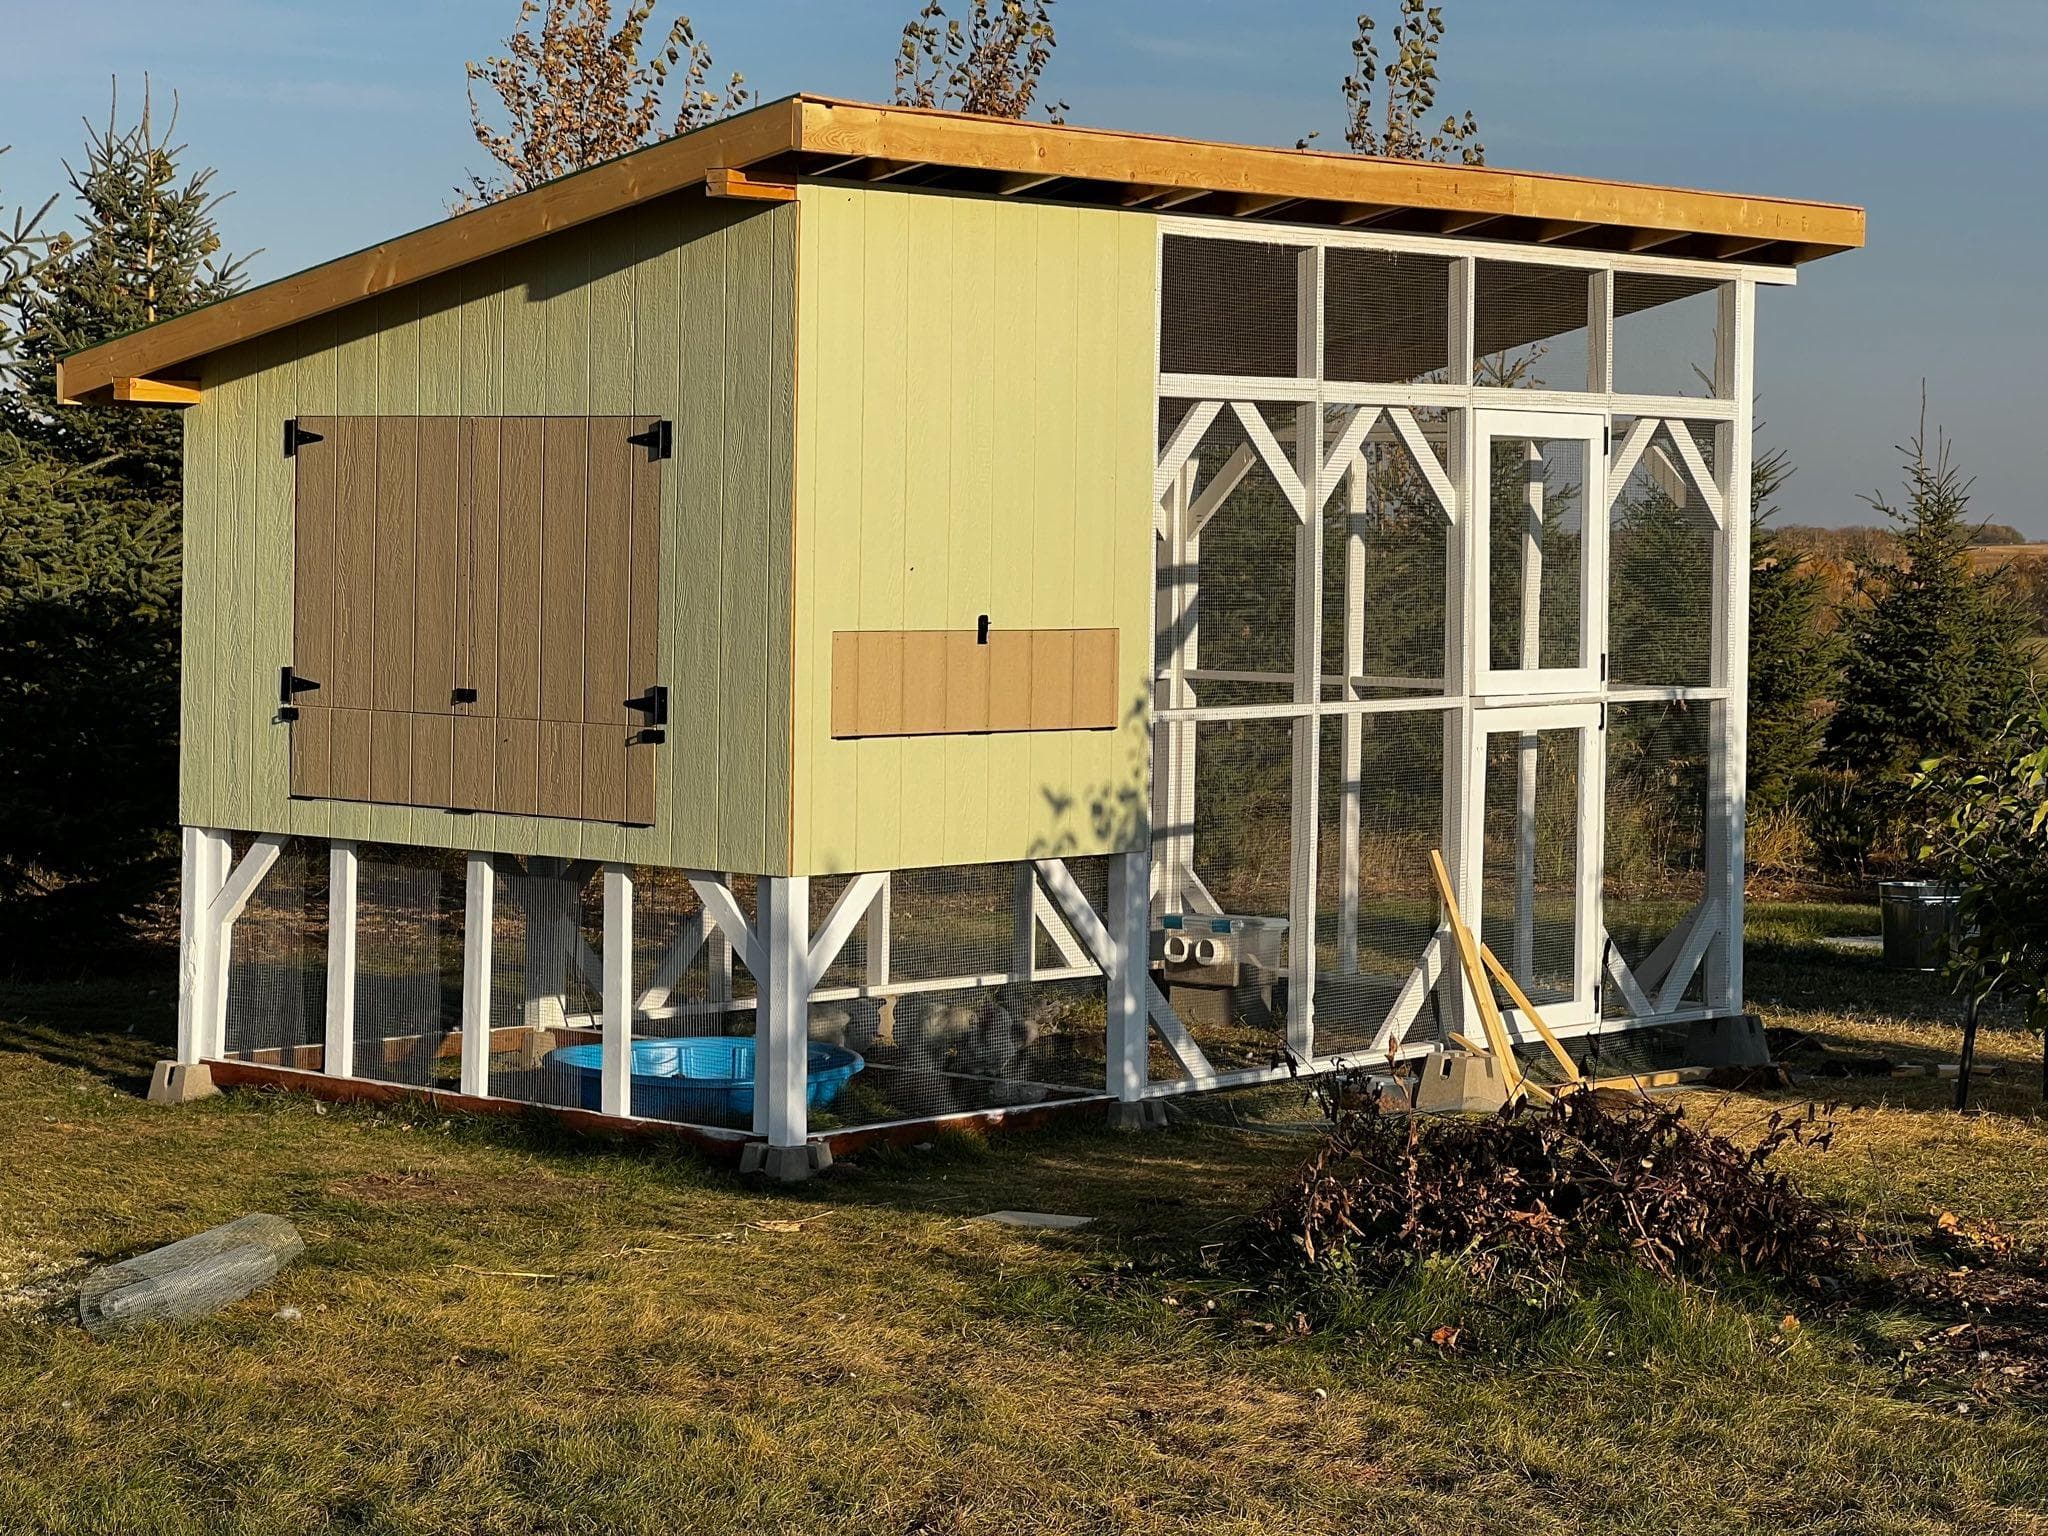
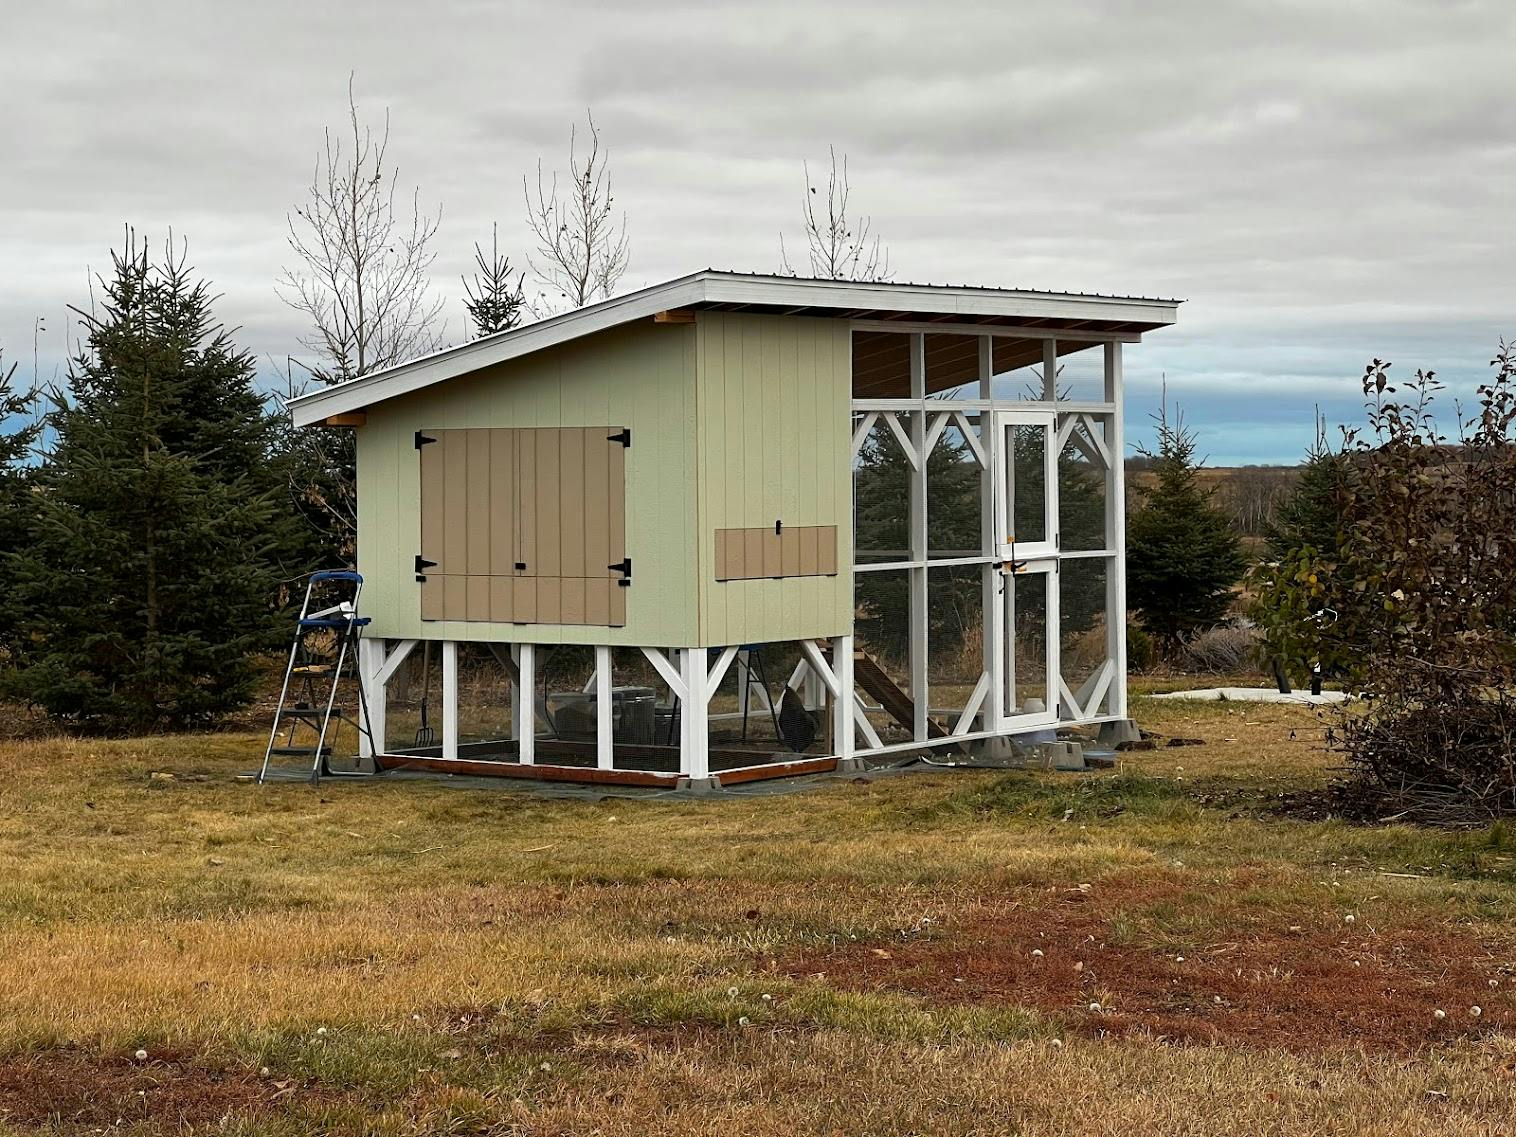
In 2023, we added soffits and my wife completed the painting of the exterior, which really brings it all together and looking more polished. She had the idea to add these transparent plastic panels you see, which makes the run into a bit of a greenhouse and blocks wind and snow, making it more pleasant for them. In the summer, they will be removed.
Overall, it was an incredible experience. There are a few things we’d change if we had to build it again, but overall, we’re pretty proud of it. It seems to hold the heat in pretty well while still having proper ventilation, and has been nice and low-maintenance so far.
We both learned a lot about construction and chicken-keeping. It was also satisfying to build something with my own hands in the physical world. It can really make you appreciate the Undo function.
Chickens – especially roosters – get a bad rap, but they’re surprisingly smart, sweet, and entertaining creatures!
Nilly the rooster gets a bath. He loved it!
It might be hard to believe, but shortly after this video he dozed off and did a full front flip off the tote he was standing on.
For more chicken videos, please check out my YouTube playlist!